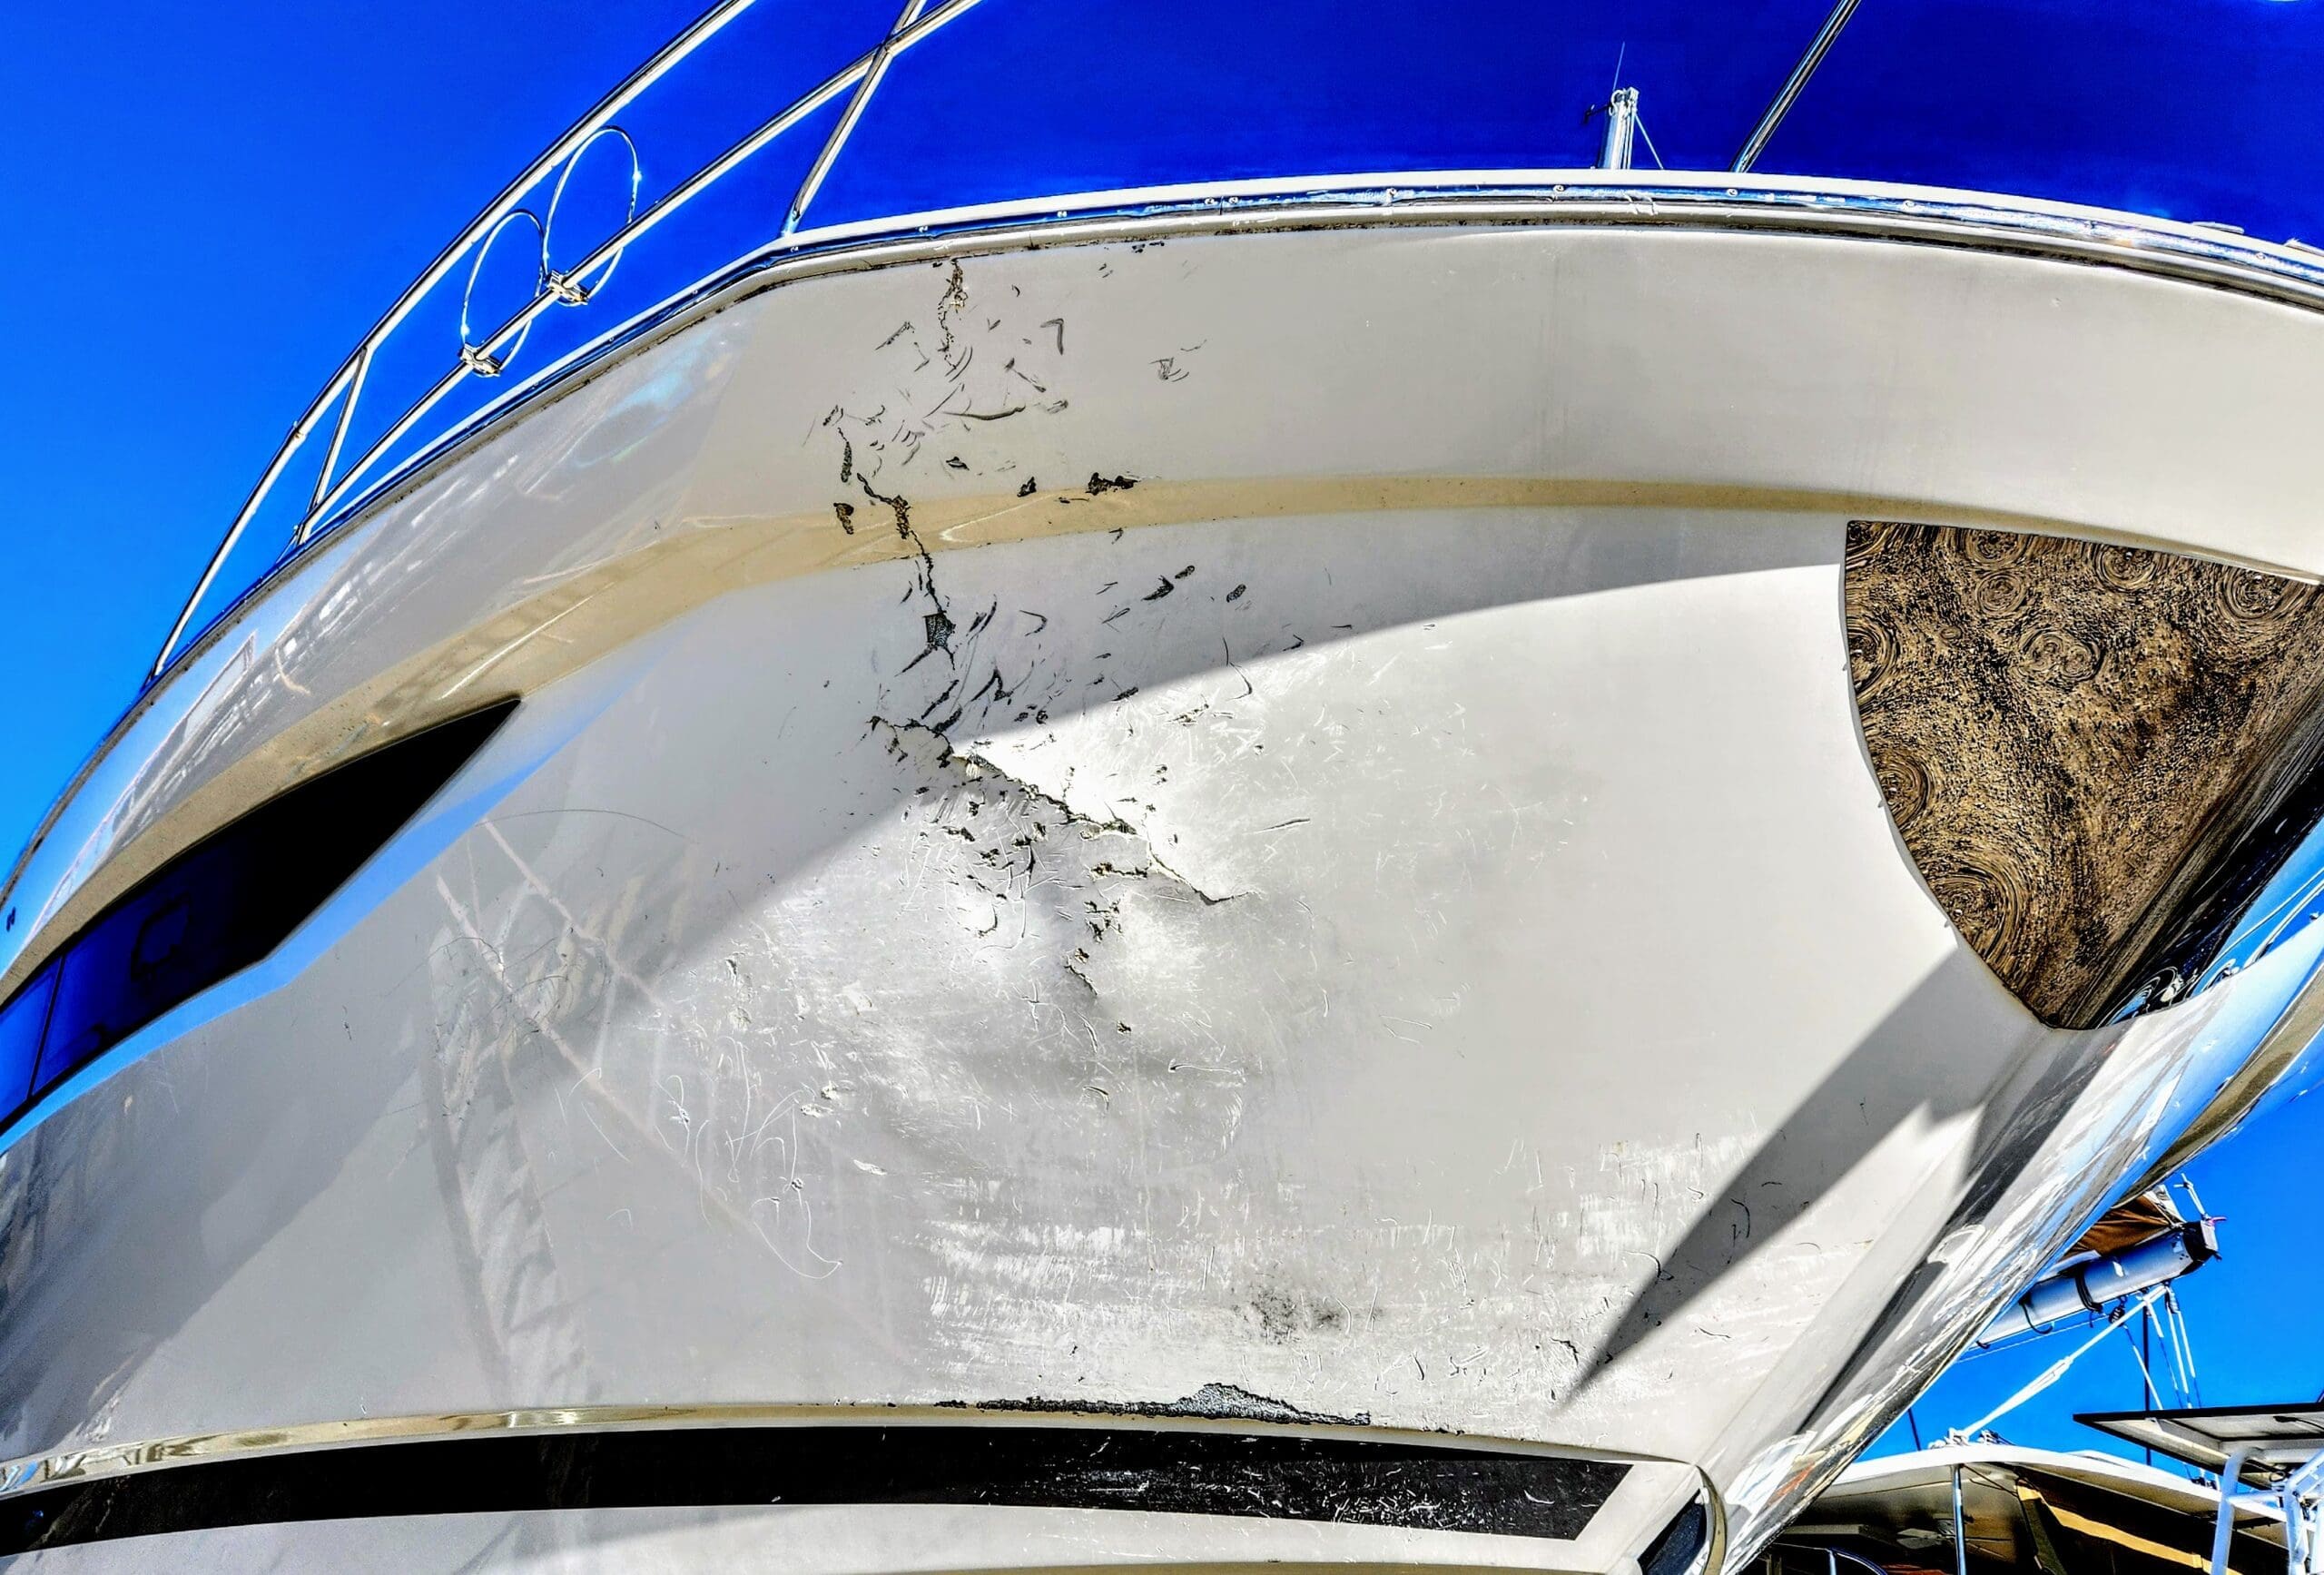
Photo of the initial fiberglass damage after the boat was hauled out at a boatyard in Charleston
How The Boat Hull Was Damaged And Assessed
This was the result of an unfortunate accident where a moored sailboat broke free from anchor during a storm and impacted a luxury motor yacht which was docked at a nearby marina in Charleston, SC.
The owner of the vessel was notified and responded to his vessel. Due to the significant amount of fiberglass and gelcoat damage, he notified his insurance company right away. The insurance carrier told him to get an estimate to repair the vessel. The owner reached out and got recommendations for a reliable fiberglass boat repair services in Charleston SC and did an online search for reputable fiberglass boat repair shops in Charleston and both roads led him to Total Boat Repair.
The next day our mobile fiberglass repair team responded to the vessel and assessed the fiberglass hull damage while the boat was at the marina. It was evident that the vessel suffered significant fiberglass damage and heavy gelcoat damage as well. We not only checked the exterior fiberglass crack on the hull but also checked inside the vessel’s compartments that were nearby the impact area and found that the impact had also delaminated the fiberglass on the interior. To explain, most yacht hull’s are not just made of multiple layers of fiberglass. Instead, most utilize an “I” beam structure where there is a core material in the middle which is typically made out of foam, honeycomb core, or wood and that core is sandwiched in between two layers of fiberglass laminate (an inner wall and an exterior wall). In this case, the core was balsa core which is small blocks of a soft permeable wood (similar to the game Jenga) that are connected to fabric backing that holds them loosely together. In this case, the “jenga” balsa core blocks were laying in the bottom of the compartment from the force of the impact. The impact caused the inner fiberglass wall to be delaminated in a four foot radius. Luckily,no one was hurt during the incident and the boats involved were the only casualties.
The Boat Insurance Claims Process
While we were on the boat, we put together a detailed estimate for the repairs. This covered not just the fiberglass and gelcoat repair, but also repainting the boot stripe.
We handle a lot of insurance boat repairs every year, so we’re really good at putting together estimates for those claims. Our main goal is always to our customer and making sure the vessel is repaired properly. That said, we also work closely with many insurance companies around Charleston, SC, to help their customers get their fiberglass boat repairs done smoothly.
Proper Selection Of The Boat Repair Materials
Using the right materials for the right boat repair is key. We occasionally get calls to fix repairs that have failed, and we’ve found that most of these issues stem from either poor materials or improper application techniques. At Total Boat Repair, we guarantee our fiberglass repairs, which means we can’t afford to use faulty materials. That’s why we only select quality products for our boat repairs.
There are different types of resins available, most notably polyester resin, vinyl ester resin, and epoxy resin. The main differences between these three are their water resistance, bond strength, and flexibility. Polyester resin is the most affordable in terms of cost and its capabilities. Vinylester offers an improvement across all these categories. Lastly, epoxy is at the top of the list with its exceptional water resistance, high flexibility, and impeccable bonding strength. For this particular repair, there was no question that we would be using West System Epoxy and hardeners, partnered with a quality fiberglass laminate.
For the fairing compound, we used a vinyl ester based material and color matched the gelcoat to apply to the boat hull. Many people believe you can’t put a vinyl ester material or a polyester gelcoat over an epoxy resin laminate due to bonding issues, but that’s not true. You can do so with zero adhesion issues if you understand the properties of the materials you’re working with, pay attention to curing times, and take adequate steps to remove the wax film that epoxy emits to its surface when cured. We frequently use epoxy for our fiberglass repairs to deliver the strongest possible repair to our customers’ boats. And, since most of those boats are gel coated, we’re able to deliver the perfect combination of a strong fiberglass repair with a matching gelcoat that lasts for the life of the boat.
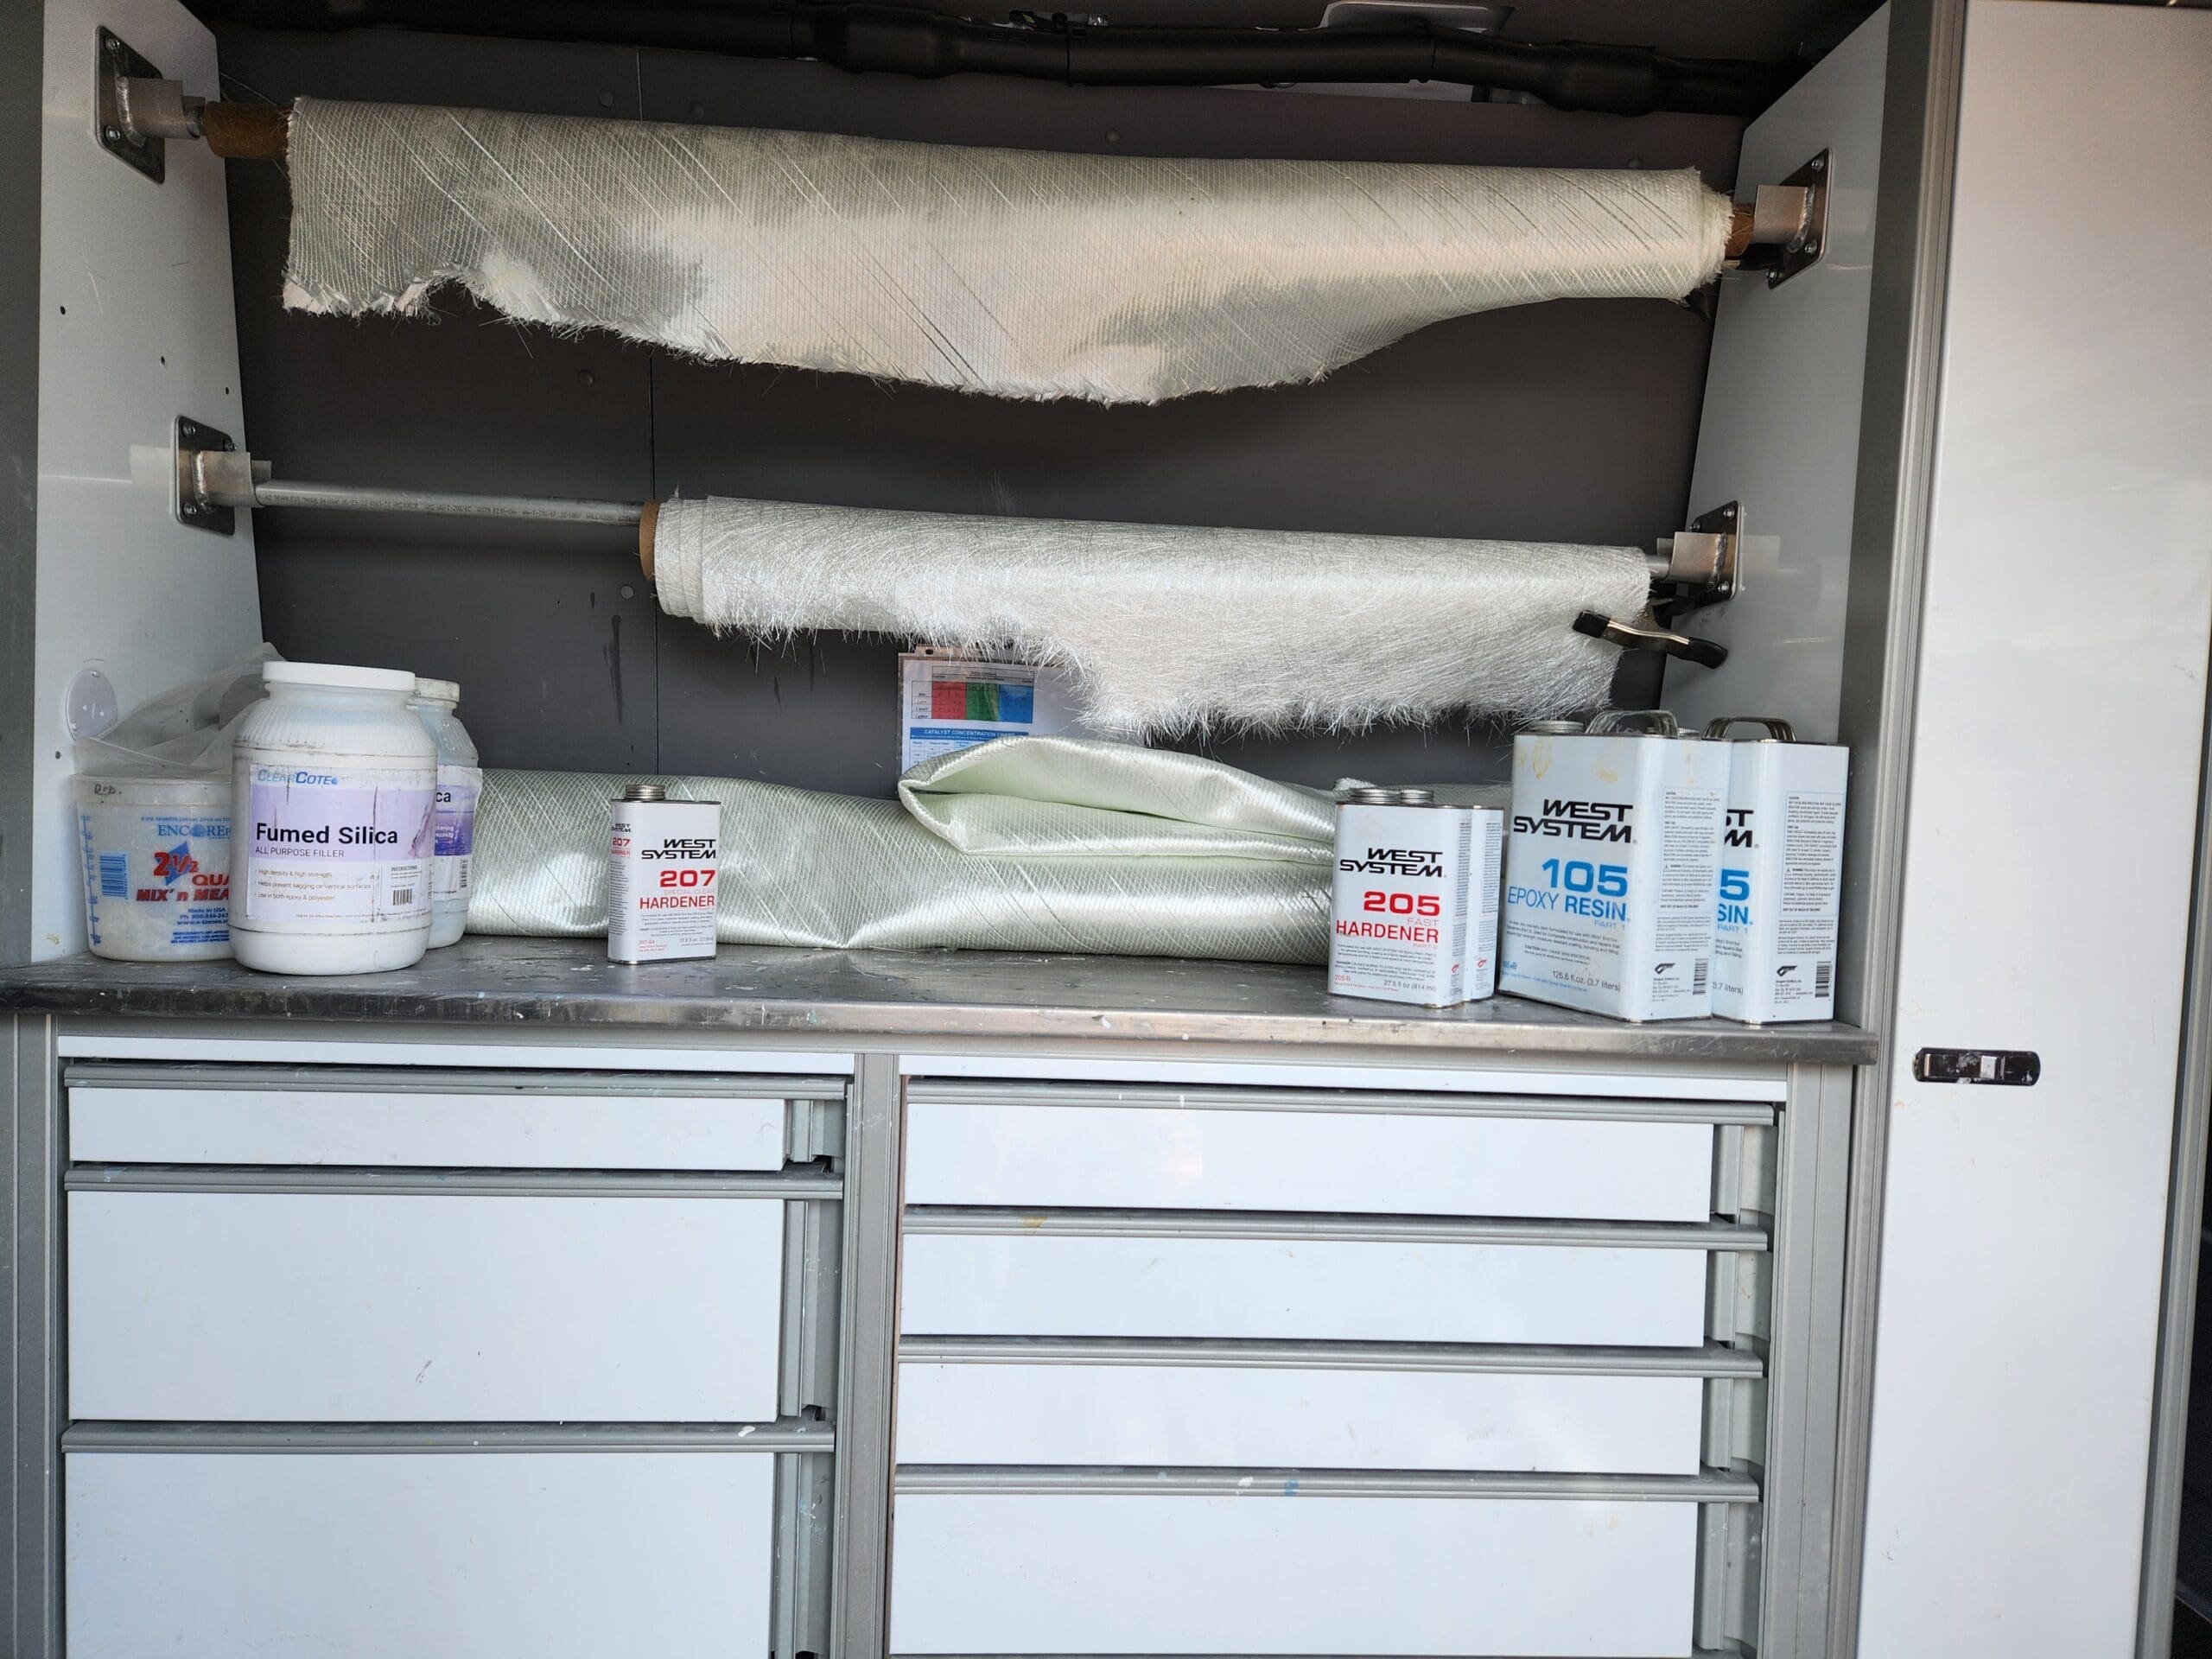
Picture of the interior of our mobile fiberglass repair vans and the products used for this repair.
Fiberglass Damage Assessment
Whether you are in Charleston, SC, or anywhere in the continental US, you can easily find West Systems Epoxy at retailers like West Marine or if you’re a professional you can locate these products through a marine distributor like Paxton or Lewis Marine.
The boat’s extensive fiberglass damage could not be repaired dockside and required that it be “hauled out”. We recommended a reputable nearby boatyard in Charleston to the customer and scheduled the repairs immediately.
We first began thoroughly assessing the damage, specifically the extent to which the fiberglass had delaminated. Once we determine that area, we expose the damage by removing the gelcoat from the boat’s surface to get to the actual fiberglass underneath. While we have performed plenty of similar structural fiberglass repairs, there is generally greater damage beyond the surface level of the gelcoat that will tell the true extent of the repair.
Once we have a good visual of the damage, we remove any and all fiberglass that has been compromised by either cutting it out or grinding it away. In this case, we removed a section of compromised fiberglass that left a hole measuring roughly two feet wide by 18 inches tall.
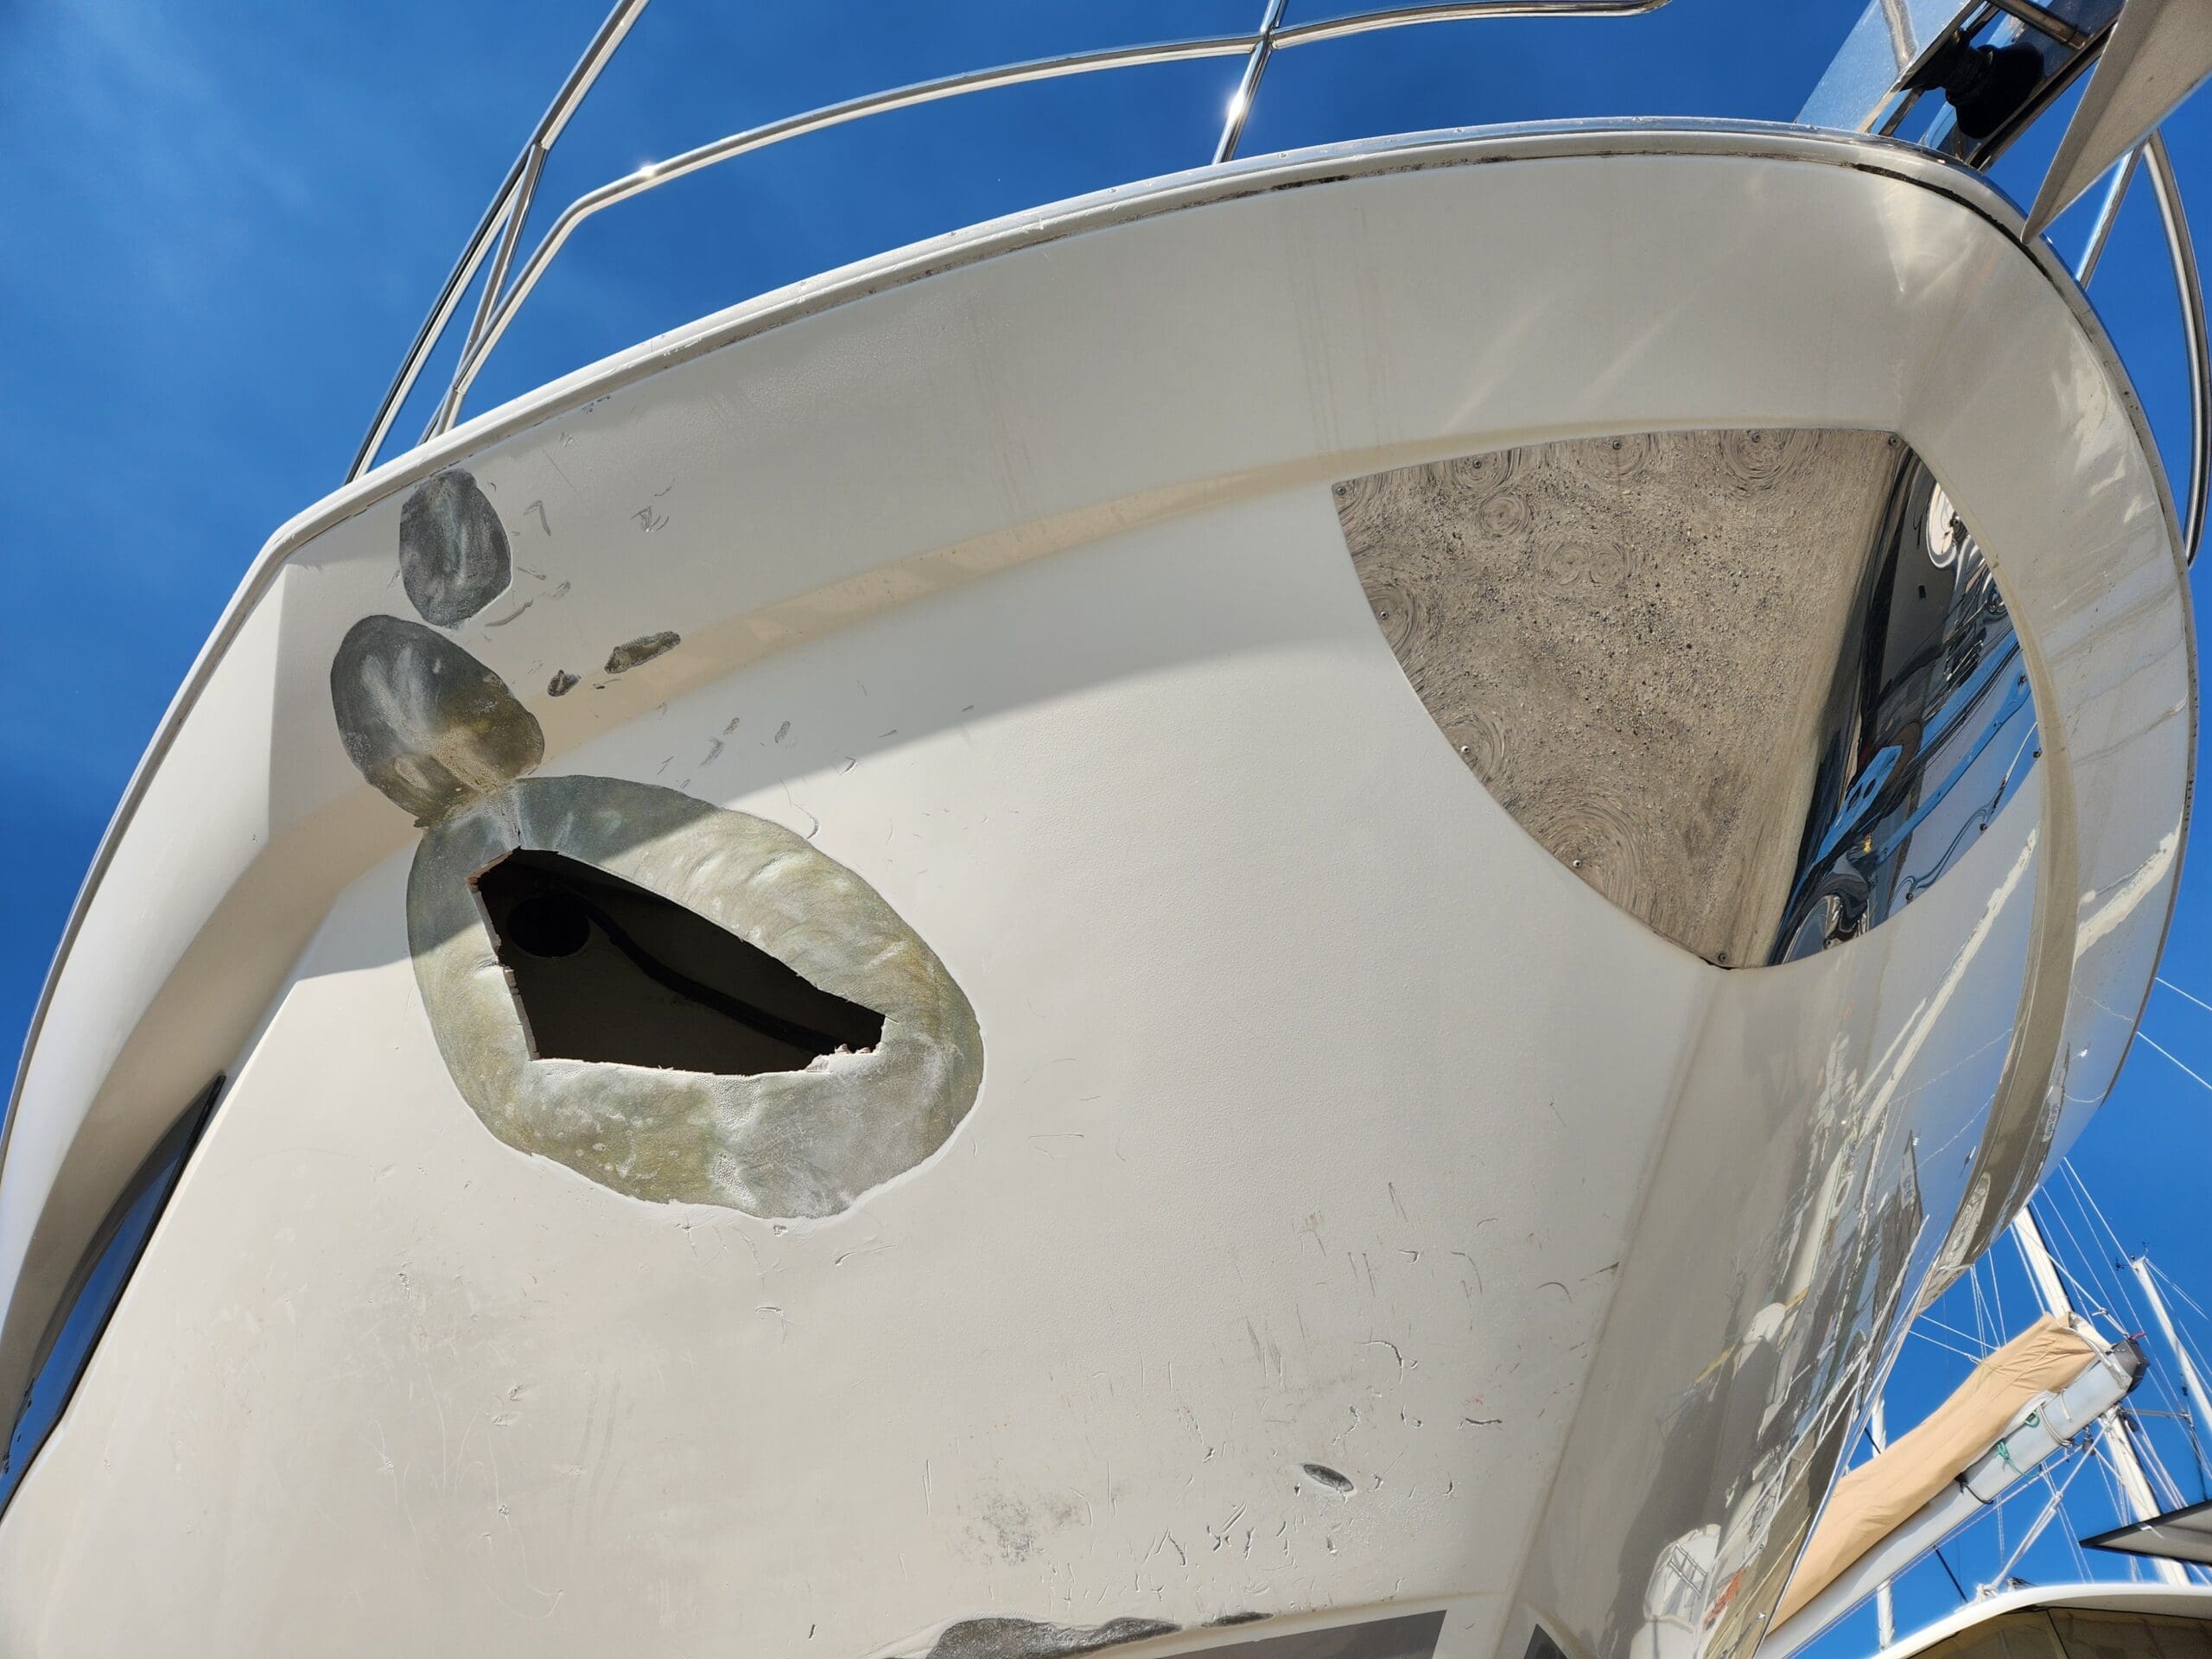
Photo of the compromised fiberglass hull that was cut out before we began grinding the perimeter of the repair area.
A Two-Sided Fiberglass Repair
For this repair, we insisted on a two-sided repair which is the strongest option for any fiberglass boat repair. And, since the bulk of the damage was on the interior, we wanted to begin there first. However, before we tackled the inside, we used a backer material and screwed it to the exterior repair area to cover the hole so when we applied fiberglass to the inside it wouldn’t push outwardly through the hole we had cut out.
Now, just like the exterior, we removed all compromised fiberglass and core material. The delaminated fiberglass was cut away and grinded to a nice taper along the edges. The interior repair area was over 7 feet wide by 6 feet in height.
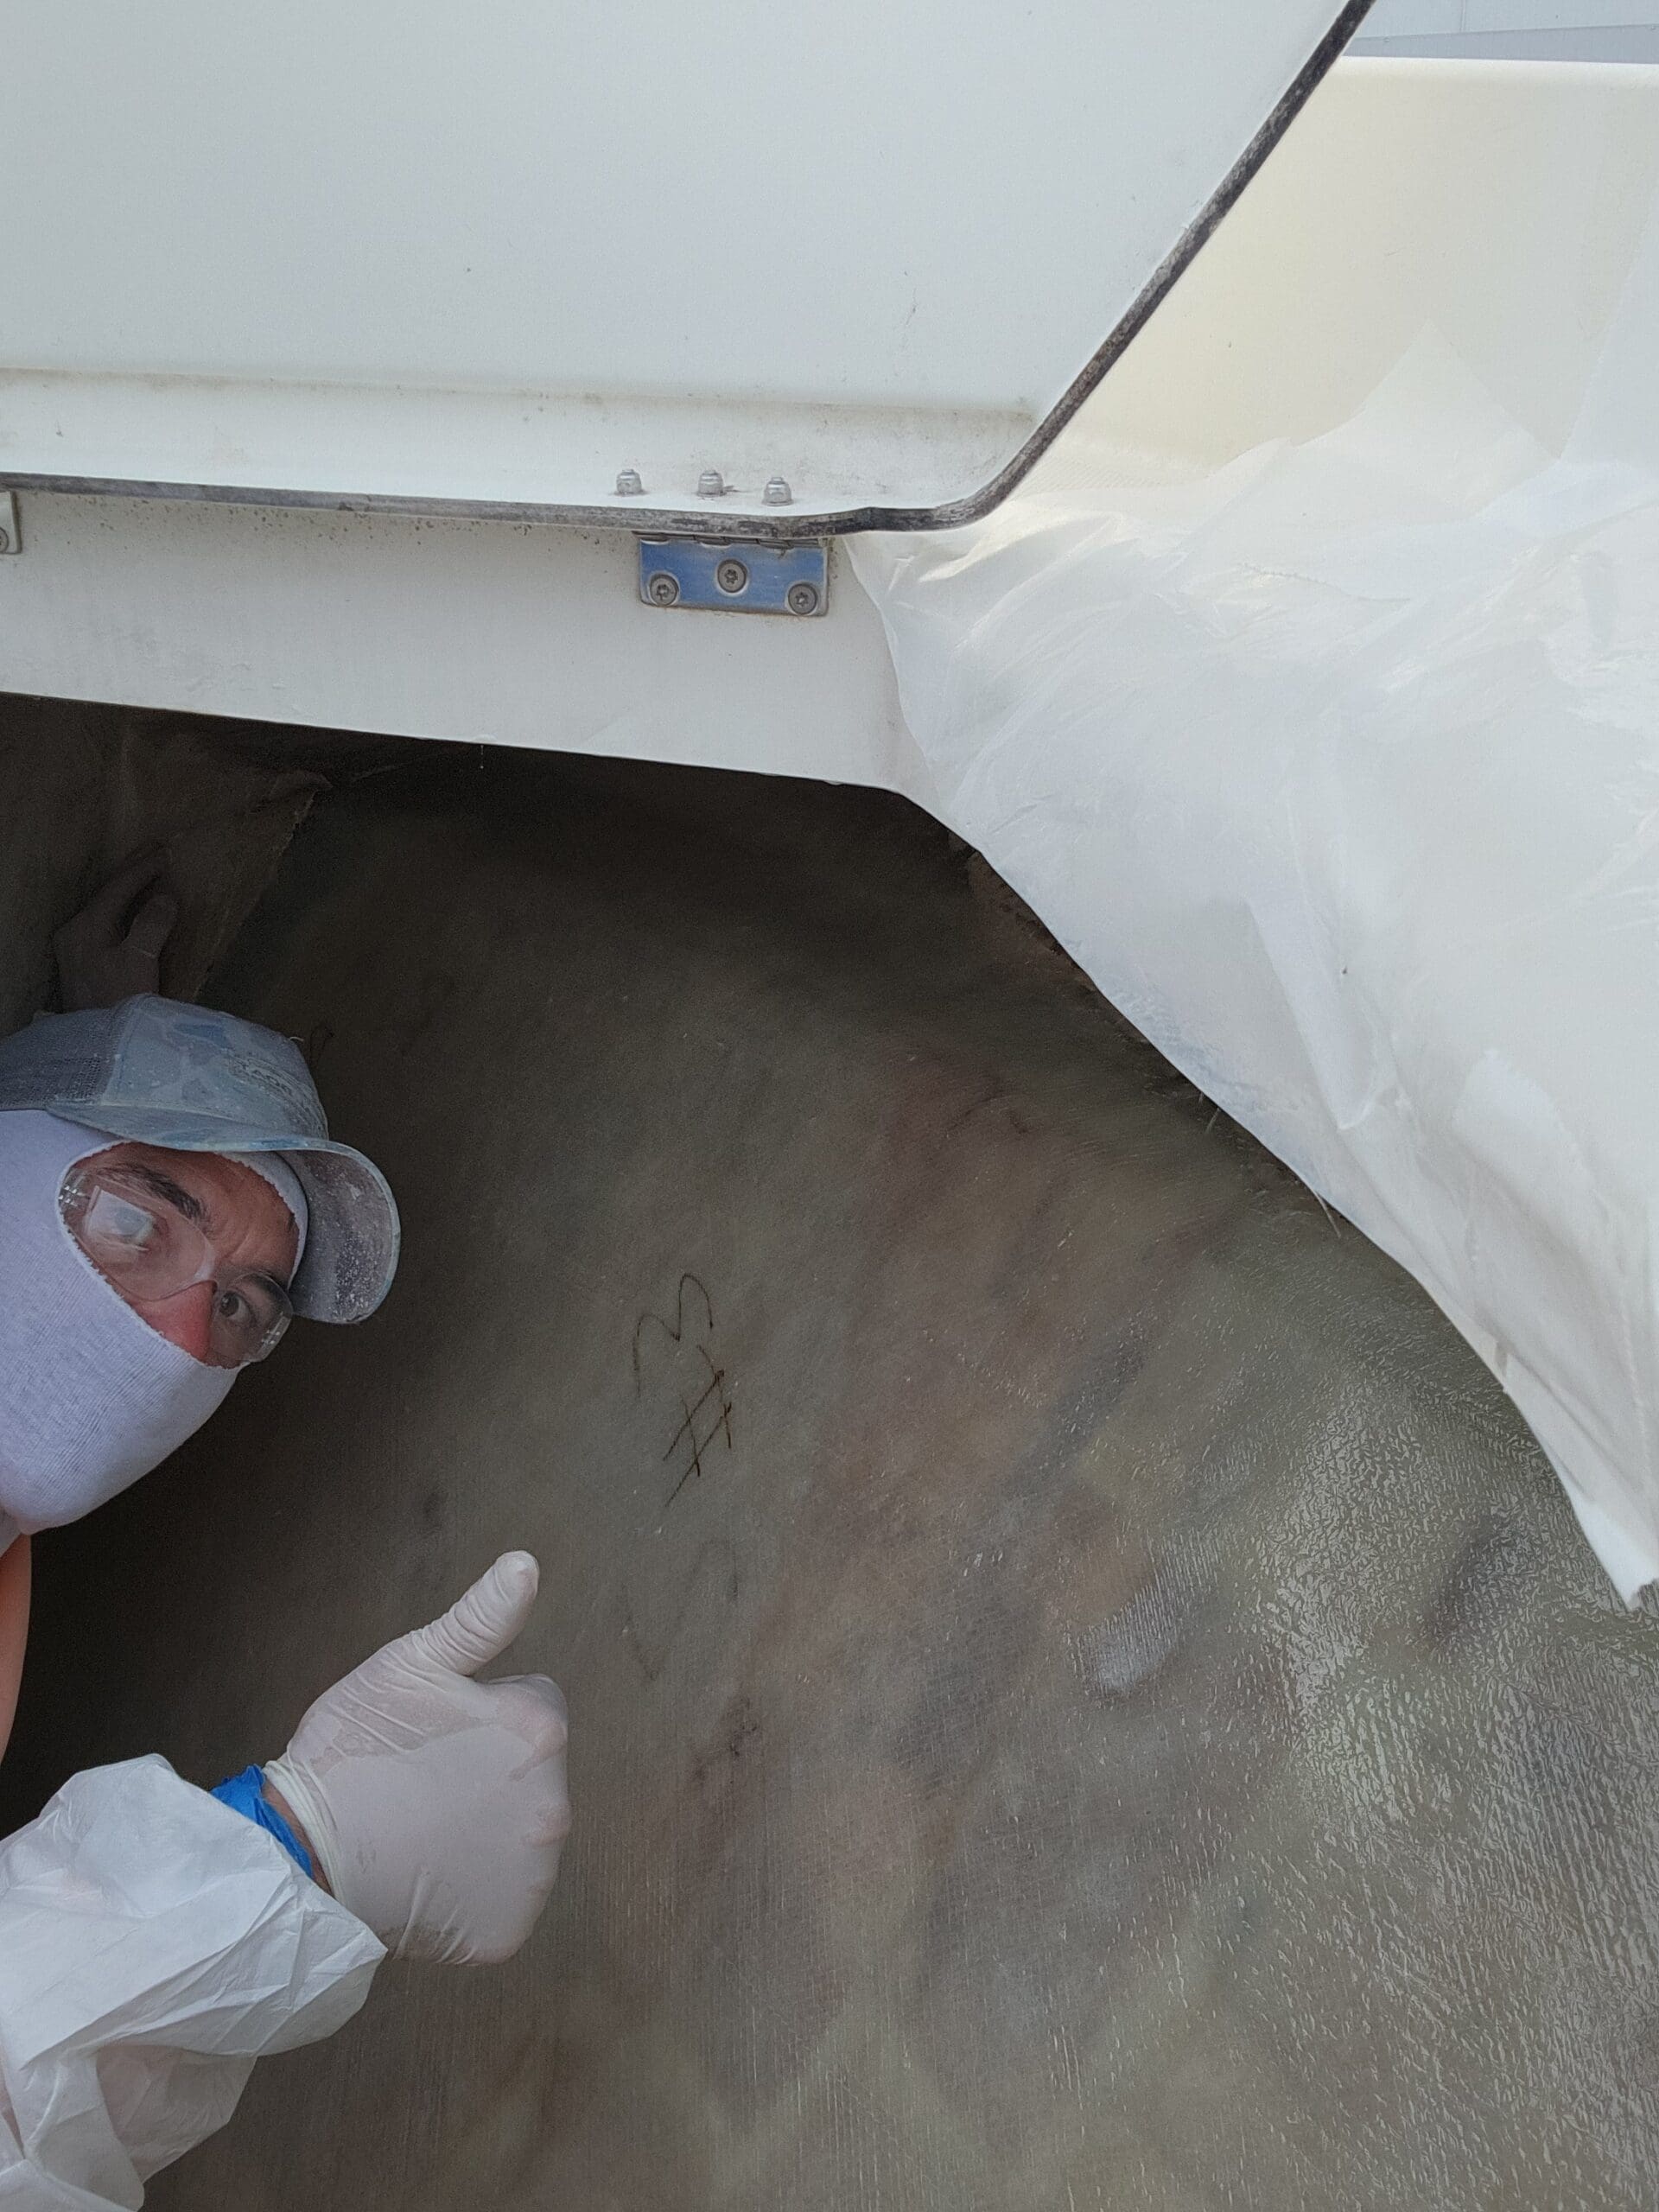
Our Fiberglass Technician in the hatch compartment getting ready to roll out a few sheets of fiberglass to the interior hull of the yacht in Charleston SC.
Since the core was balsa core we used the same material as the core replacement. However, instead of polyester resin, we used West Systems Epoxy and hardener to provide a much stronger repair than the manufacturer’s selection. After we applied epoxy to the repair area the core was ready to be placed in. We installed it in sections as large as we could handle, mostly 2 feet by 2 feet. We filled all the voids with missing or compromised core until it was uniform and looked factory. Next, we applied the epoxy resin to the core material and since Balsa is a softwood it soaks it up nicely. For this process we used a slow hardener by West Systems so we had ample working time for reapplication as the Balsa was drinking up the resin.
Next, we had pre cut out sections of biaxial fiberglass that was ready to be installed. Typically, we like to “wet out” our fiberglass in a separate location and then install, however these sheets of fiberglass were large so we applied them dry and then wetted them out with the epoxy resin. We wanted to use larger sheets so that we would have maximum grab should the boat be tested again. Whenever we do a fiberglass repair our goal is a seamless match to near perfect condition as it existed prior to the damage, so we wanted to apply gelcoat over the fiberglass we laid up. Therefore, we added West Systems release fabric over the repair area. The release fabric was removed 24 hours later and we applied our color matched gelcoat to the interior repair area.
Now, we were ready to continue on the exterior repair area. We grinded back from the hole we had cut out to a nice taper to allow our fiberglass to blend into. We applied several layers of biaxial fiberglass with epoxy to match the existing thickness of the boat hull and yet again used the release fabric as the final step. Once the epoxy cured, we removed the release fabric and prepped our repair for fairing. We used a vinyl ester fairing compound which was applied in thin layers where needed and then sanded to conform to the original hull shape. Once the fairing was completed, we began working on the many gelcoat repairs such as chips, gouges, scratches and scrapes that were littered throughout that side of the hull. We removed the damaged gelcoat, filled, faired and prepped that side of the hull for gelcoat application.
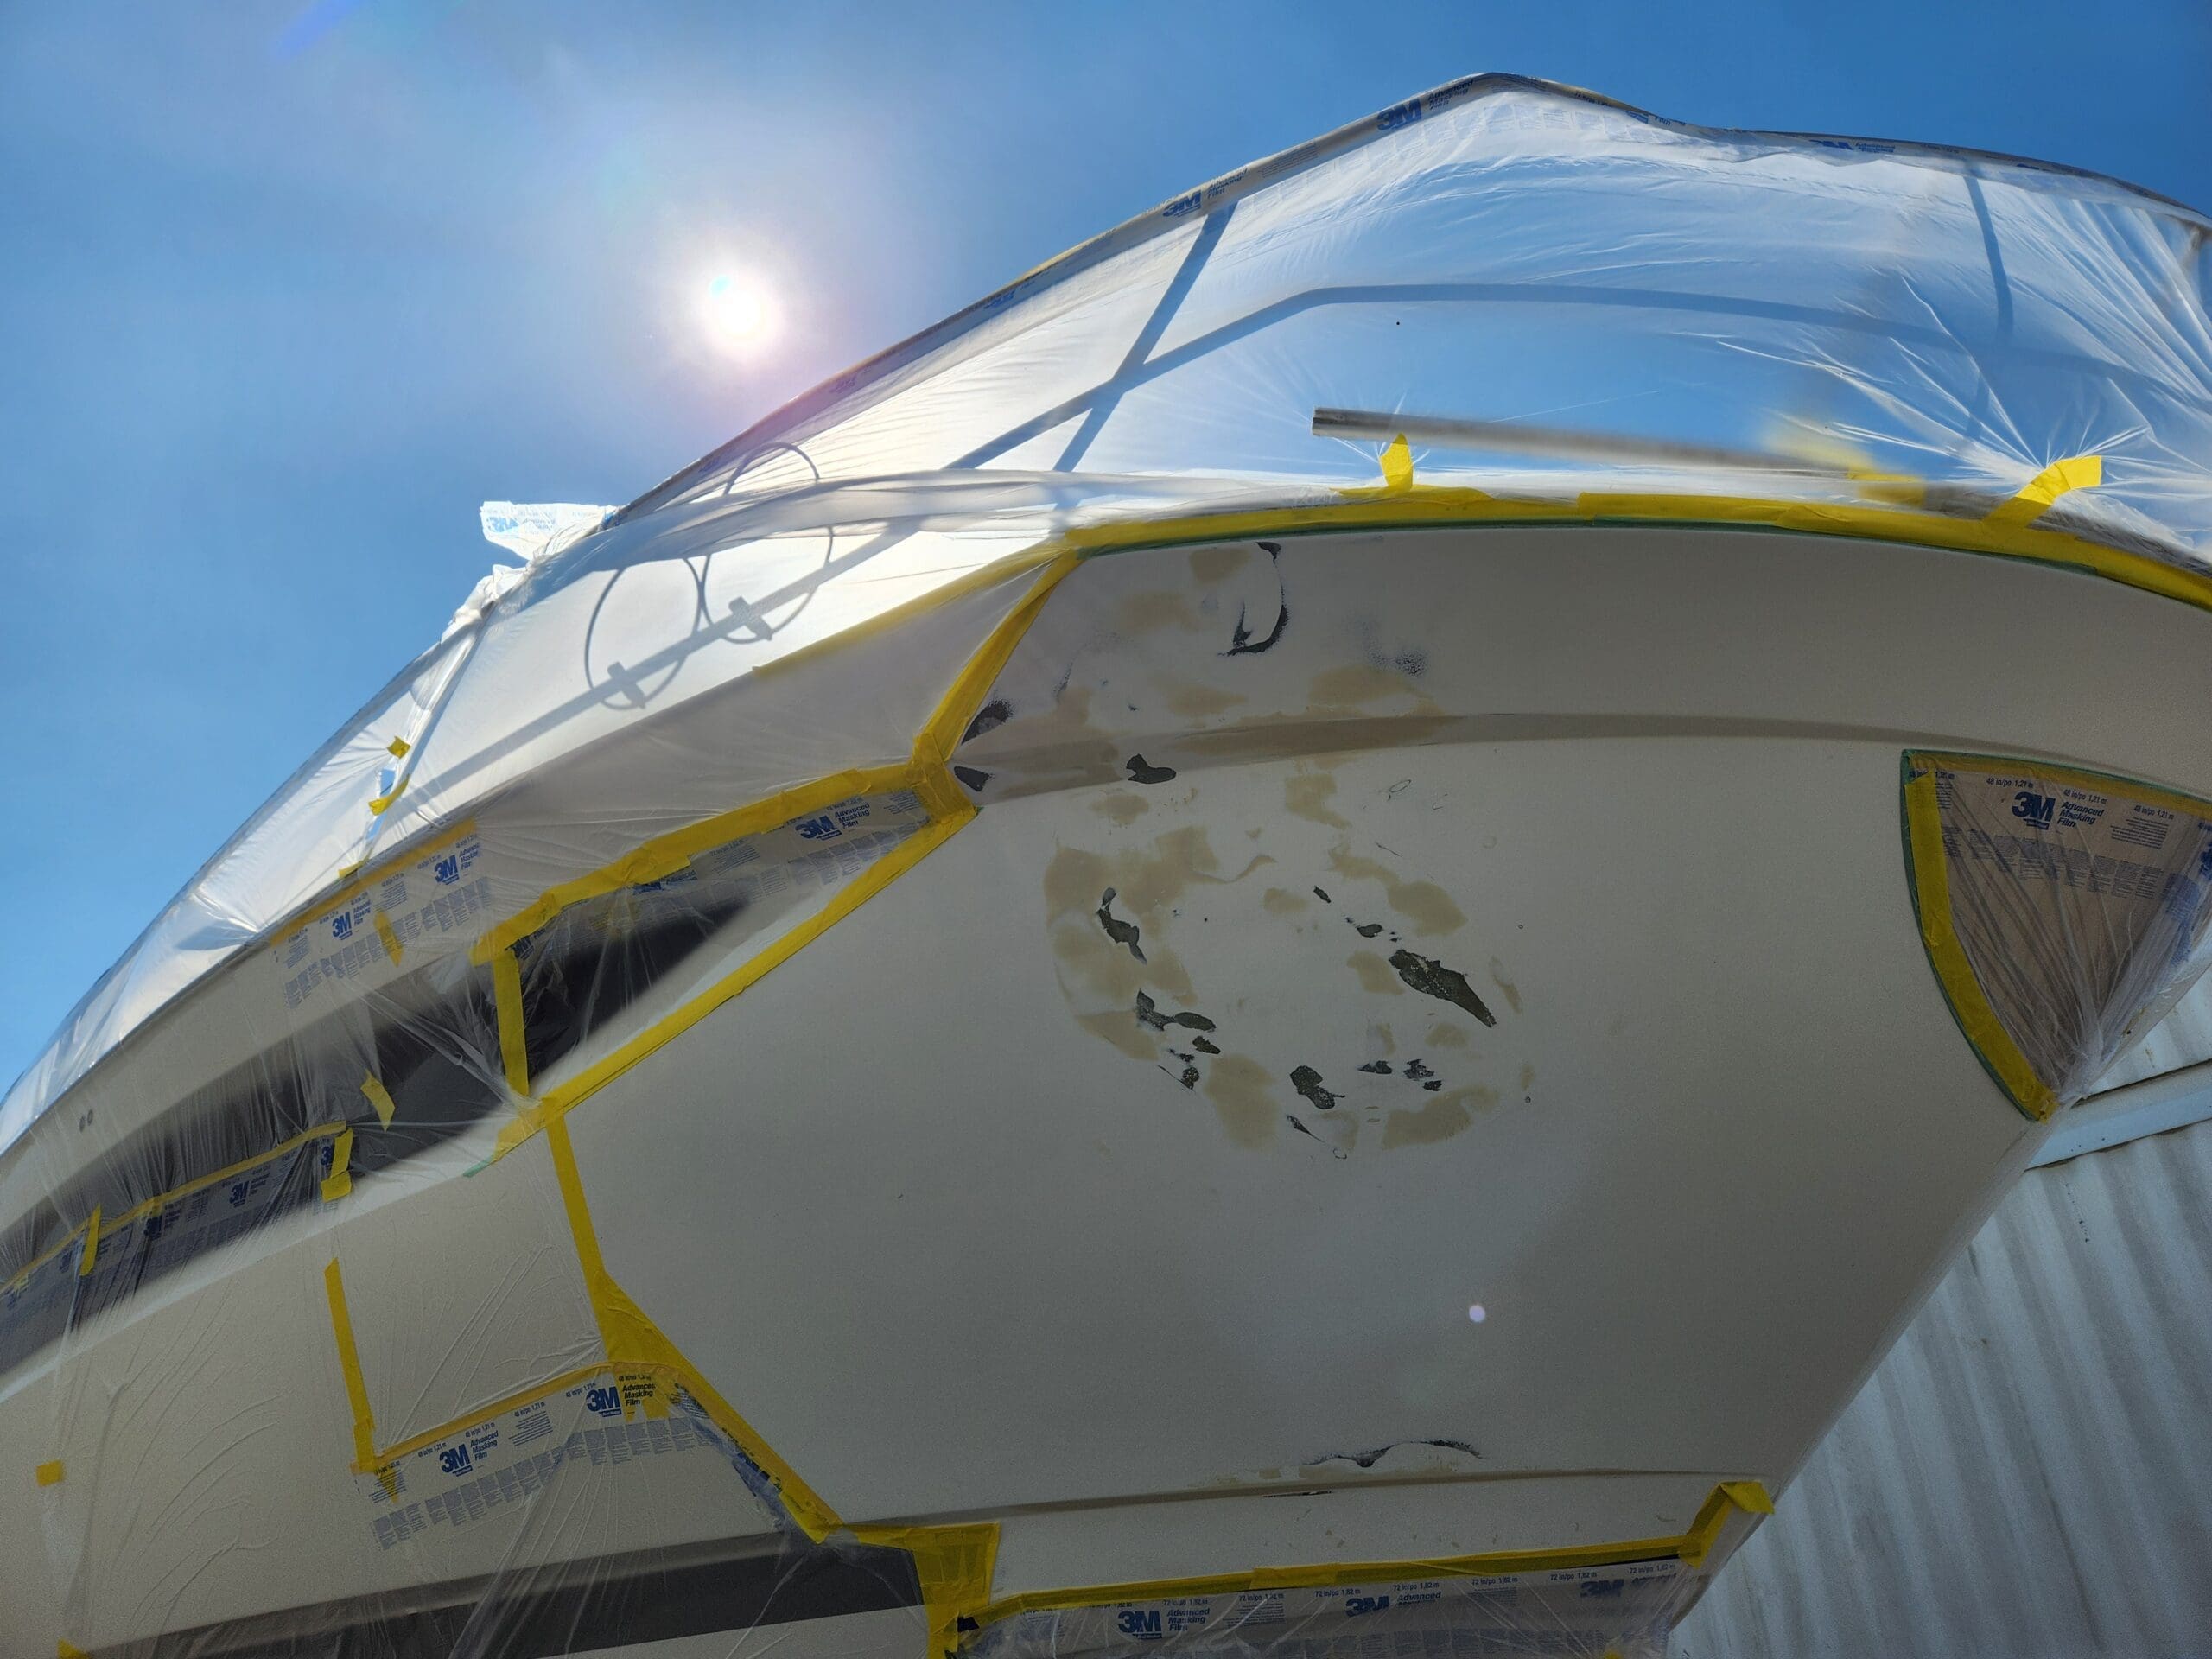
Photo of a yacht prepped for gelcoat application
Color Matched Gelcoat Application
Before we got to this stage, we had taken the time to color match the gelcoat. We tested that gelcoat through several applications to ensure the color matched exactly before approving it. After the last check to ensure all of our gelcoat and fiberglass repairs were fair and consistent with the hull, we were ready to spray our gelcoat. We applied several coats of the color matched gelcoat to the hull and we changed the ratios of hardener and wax added to the gelcoat through every coat to control the curing process. Because, gelcoat is exothermic meaning basically that it cures to it’s finished state through the application of heat. MEKP (Methyl Ethyl Ketone Peroxide) is the heat catalyst for gelcoat that initiates that process of polymerization or in simpler terms it kick starts the chain reaction of the chemicals to make gelcoat cure properly. We tweak the levels of additives and catalyst added to each coat applied so that the gelcoat doesn’t cure too fast and trap styrene monomers and create pinholes. Once the gelcoat had cured, we began sanding down the gelcoat starting at lower grits and working our way towards higher grits until we had removed any imperfections from the surface to ensure it was flush and fair with the existing contour of the boat.
Applying the Awl-Craft Boot Stripe To The Boat Hull
After the gelcoat repair, we now had a painted boot stripe to repair. The owner had the boot stripe painted on in Florida when he purchased the boat earlier. Since he was able to remember the boat repair shop that applied the boot stripe, we were able to contact them and find the same product that they used which turned out to be Awl-Grip’s AwlCraft SE which is a metallic paint. Metallic paints such as these when sprayed can take on different color tones which are dependent on the air pressure that you are spraying it at. We performed several test sprays and found the right pressure which matched our boat’s color. After the surrounding area of the repair was prepped and taped off, we applied several coats of the AwlCraft SE paint to the hull of the boat, followed by several coats of clear coat.
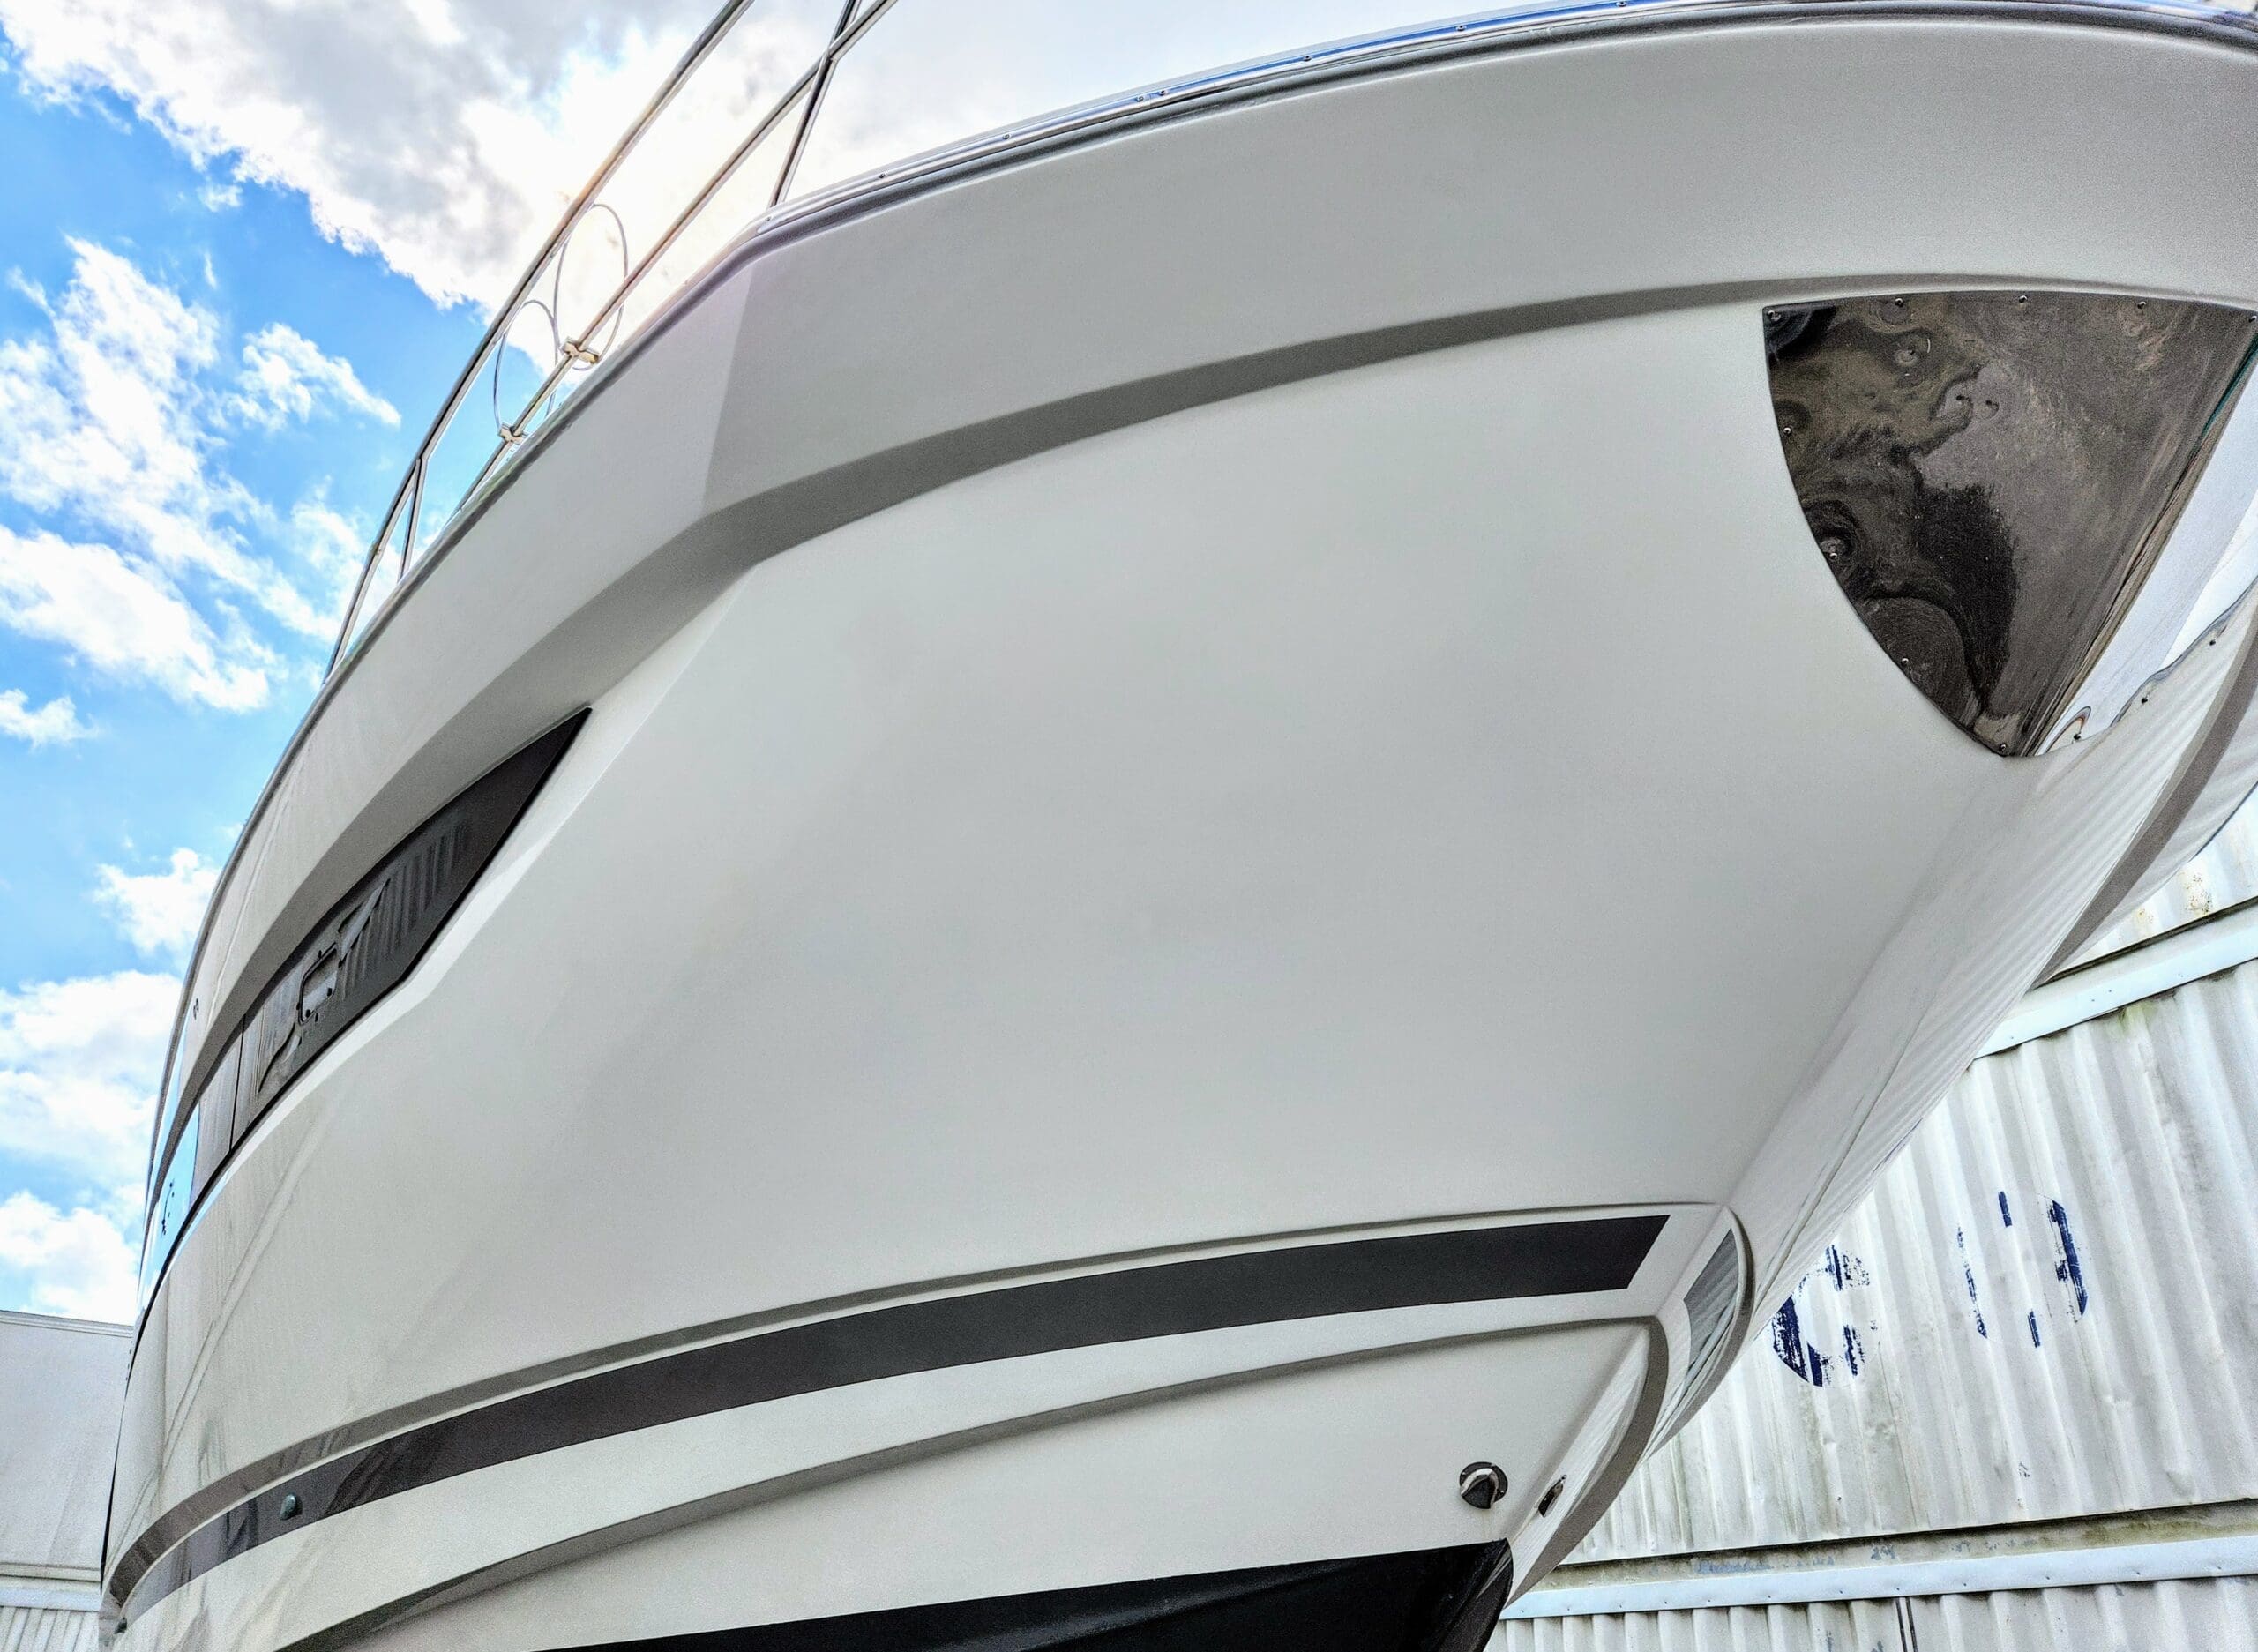
Photo of a yacht that has recently undergone a fiberglass hull repair
Our Mobile Boat Detail Team Finished The Job
Lastly, we brought our mobile boat detail team who is located in Charleston in on the action. They inspected the boat hull’s surface and began their procedures of first cleaning the repair area. Next, they “cut” the boat hull with a medium level compound and further removed any imperfections in the gelcoat’s surface. After that they polished the hull using a random orbital polisher paired with the proper pad to give it the brilliant shine and final touches the boat deserved.
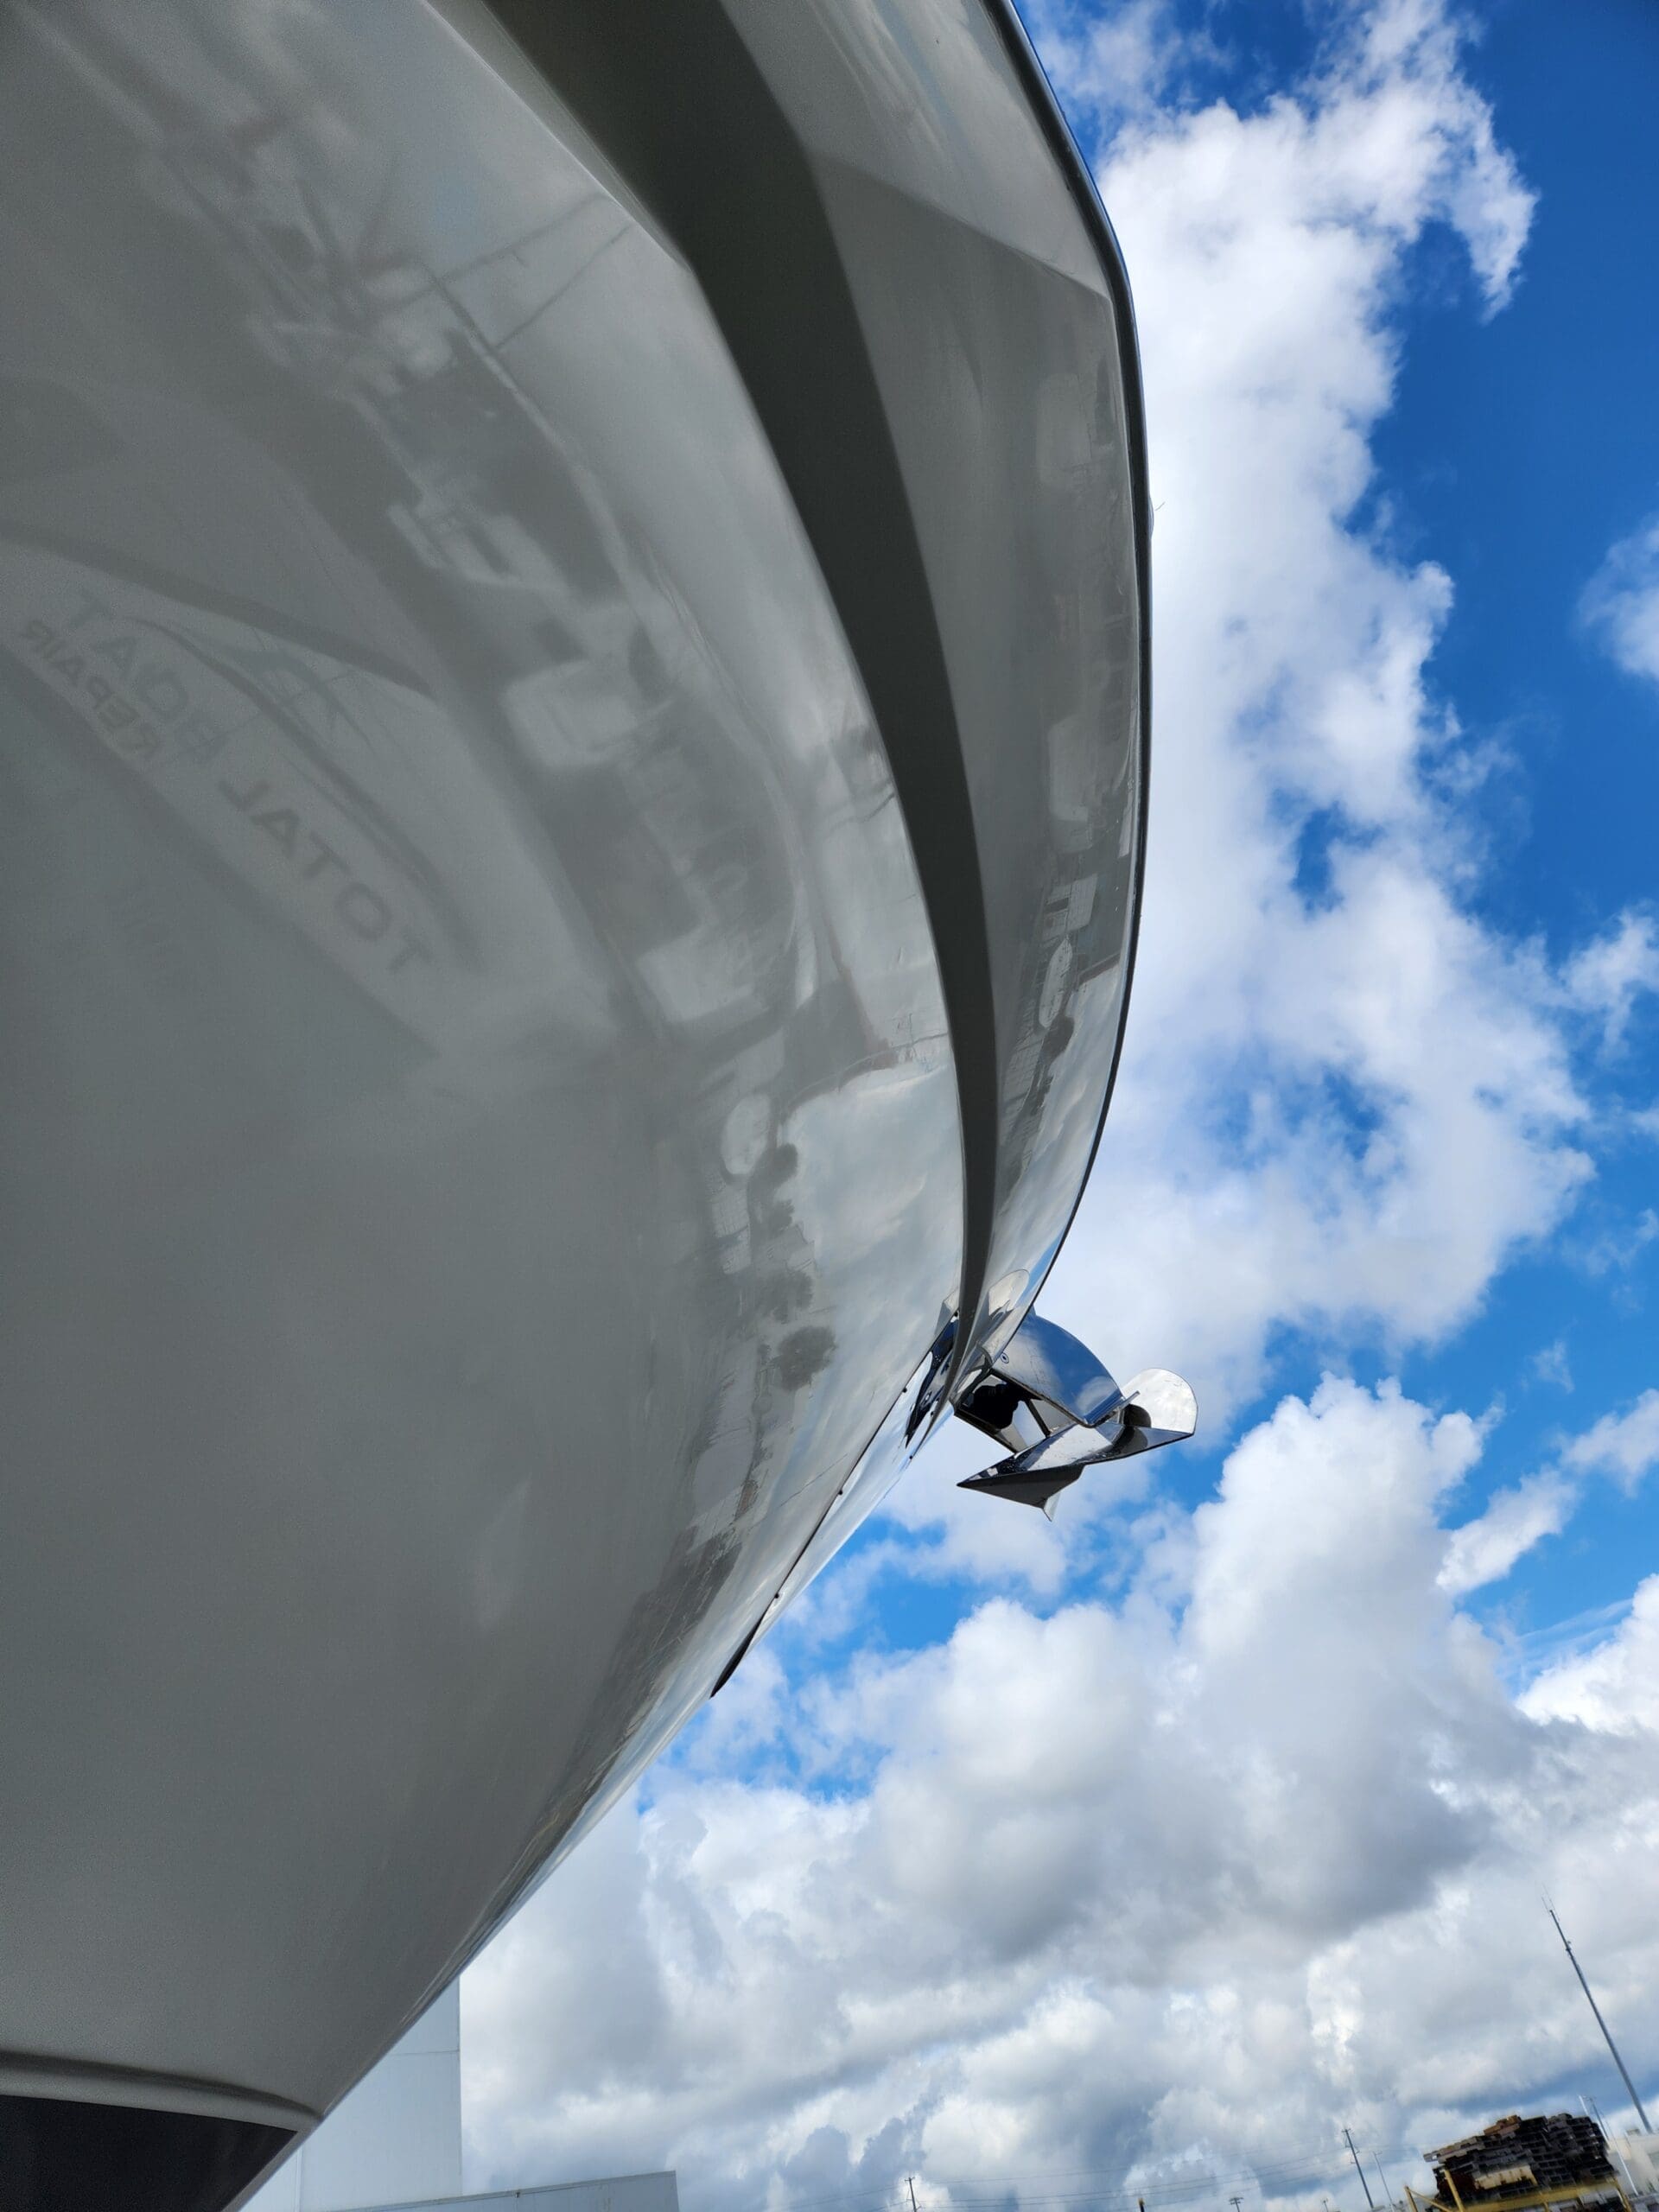
Photo of a yacht that has just been detailed after a gelcoat repair
Bringing The Fiberglass Repair To Completion
The boat repair was finished and the owner couldn’t have been more impressed as he thought his boat was beyond repair. It brings us great joy to be able to satisfy our customers with outstanding results. If you are in the Charleston area and in need of fiberglass repairs, we are Total Boat Repair and we are happy to help.
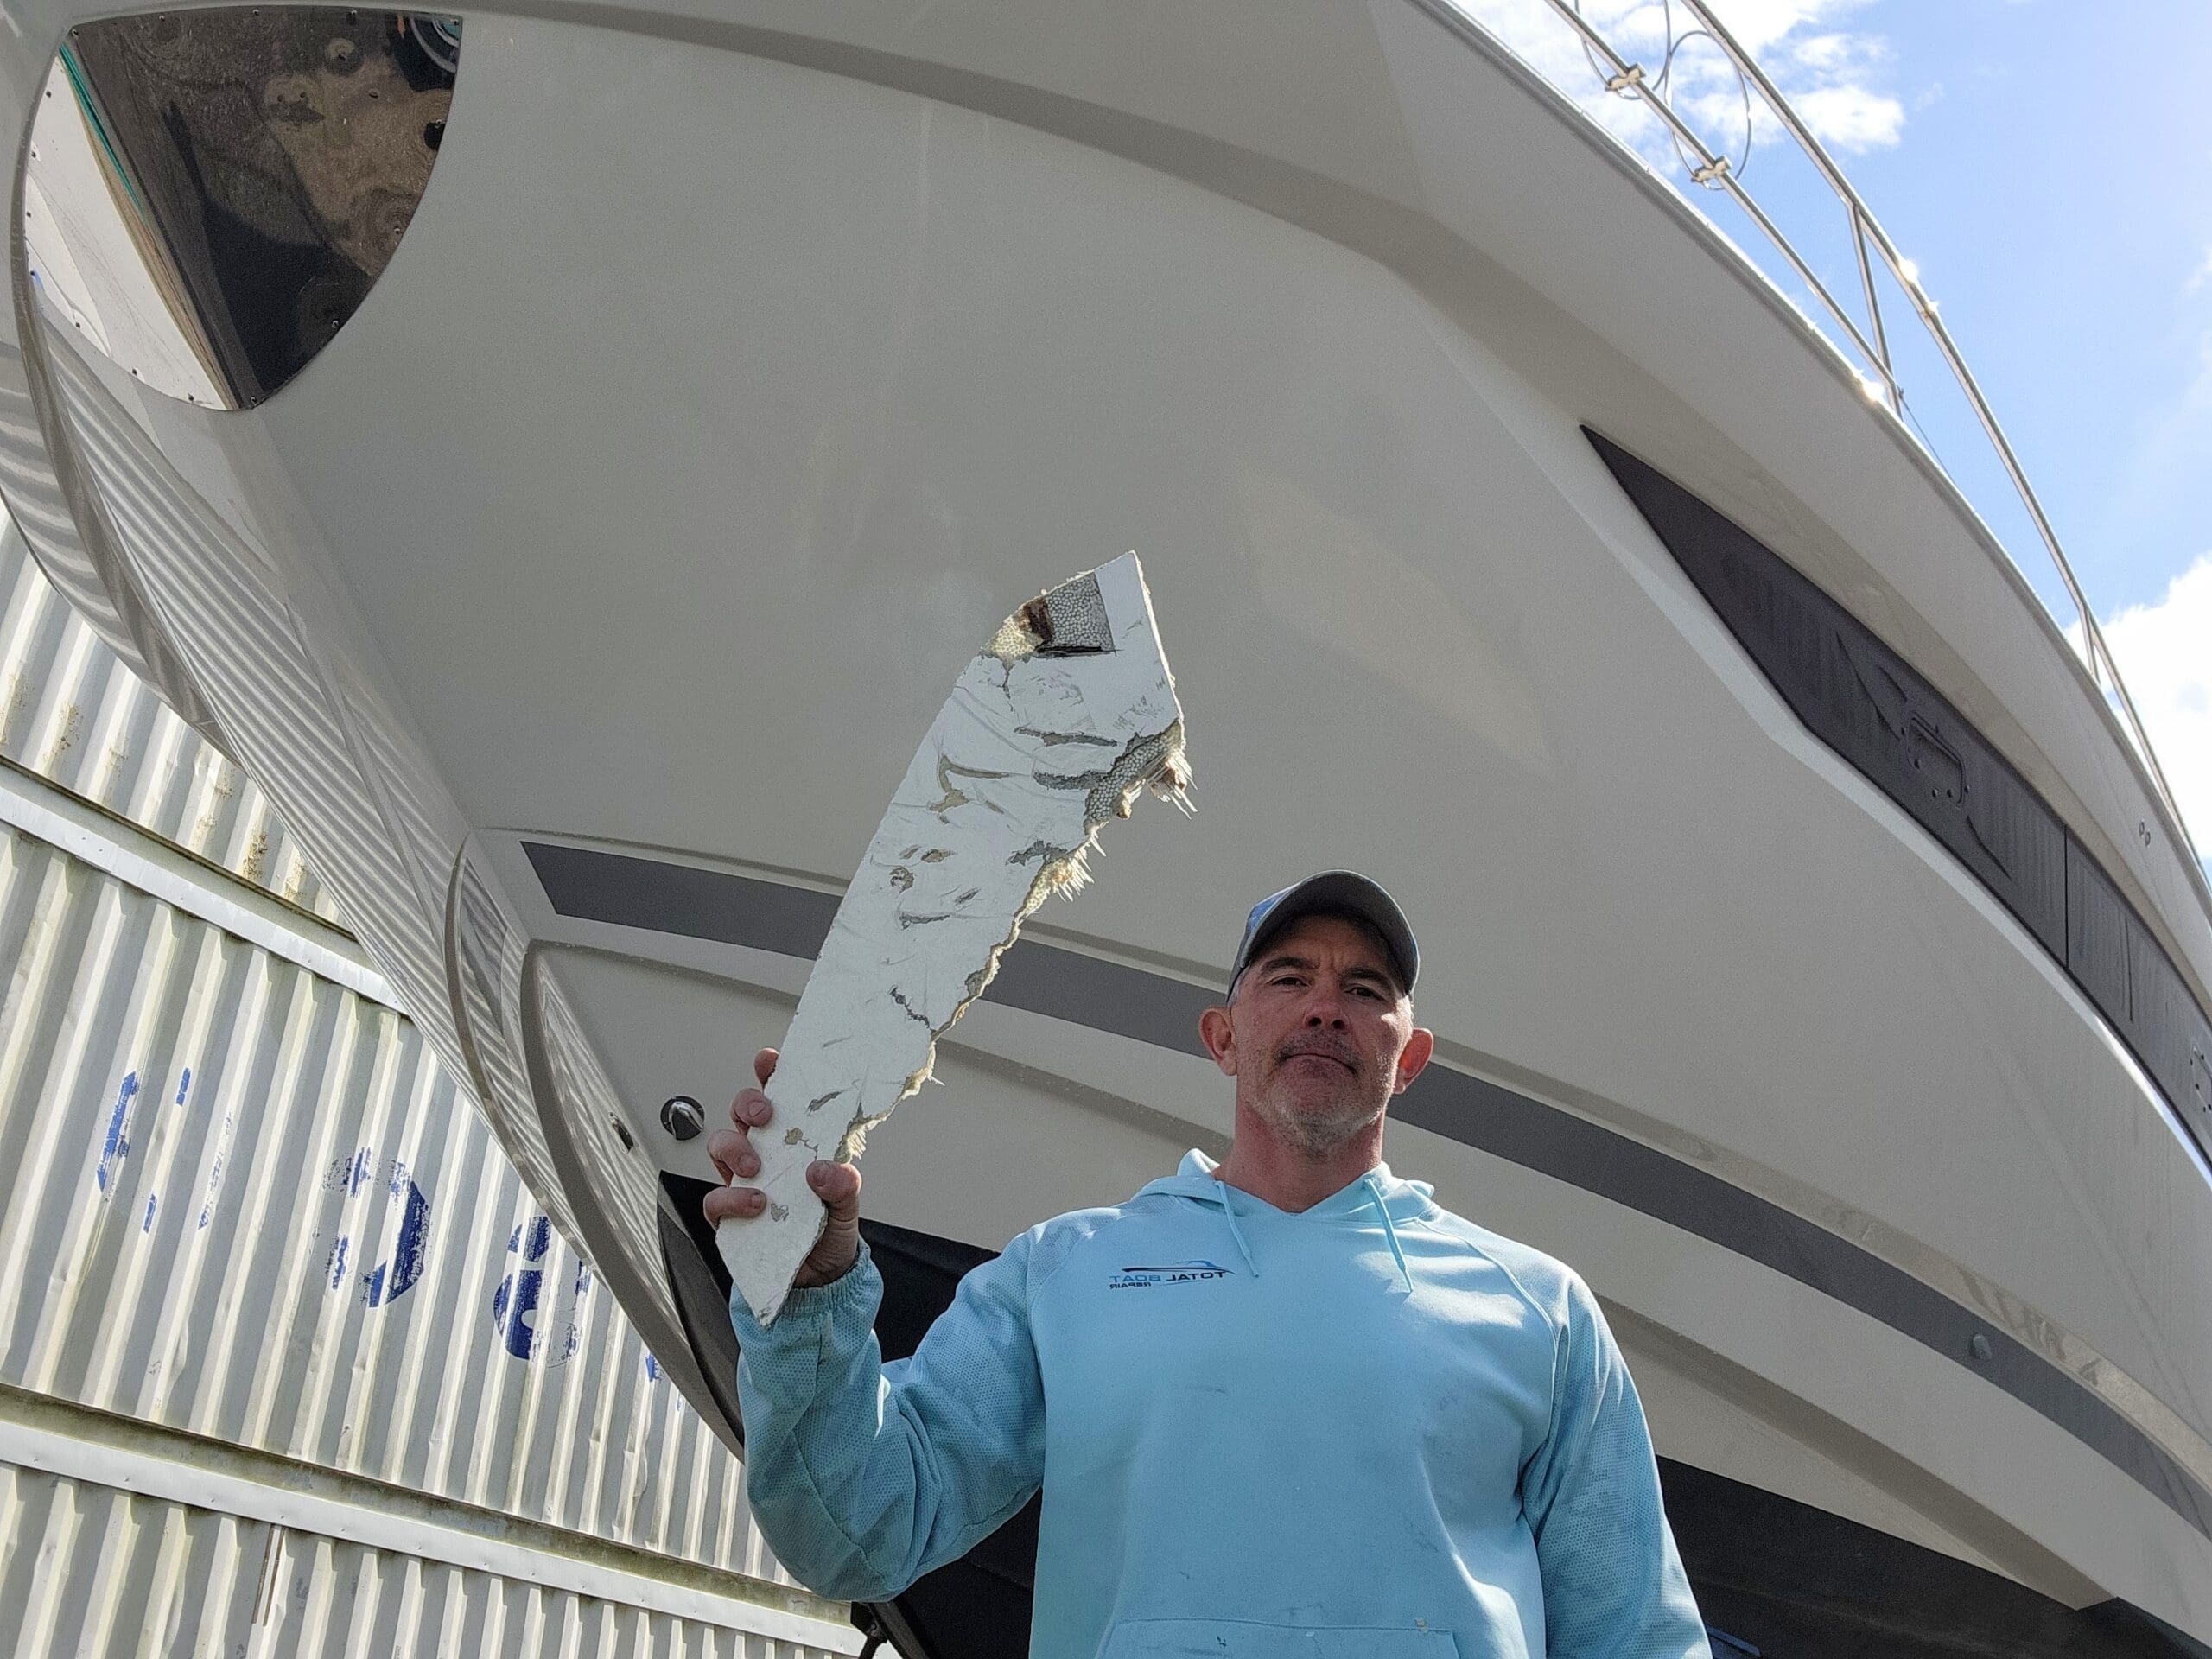
Photo of our Fiberglass Repair Technician holding a piece of the damaged boat against the finished product
